Steps to transform your car's exterior with Matte Vinyl Wraps
Revamp Your Ride: Transforming Your Car's Exterior with Matte Vinyl Wraps
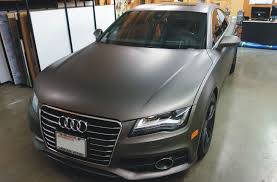
If you're looking to give your car a fresh, modern, and stylish look, Matte Vinyl Wraps are an excellent choice. They offer a sleek, non-reflective finish that stands out from traditional glossy paint jobs. Plus, they protect your car's original paint while allowing you to experiment with a variety of colors and textures. Here’s a step-by-step guide to transforming your car’s exterior with matte vinyl wraps.
Step 1: Prepare Your Workspace
Before you begin, ensure you have a clean, well-lit, and dust-free workspace. A controlled environment will help you achieve a flawless finish. Gather all necessary tools, including a heat gun, squeegee, utility knife, cleaning supplies, and, of course, your matte vinyl wrap.
Step 2: Clean Your Car Thoroughly
A clean surface is critical for the vinyl wrap to adhere properly. Wash your car with soap and water to remove dirt, grease, and grime. Follow up with an alcohol-based cleaner to eliminate any residue. Pay special attention to crevices and edges where dirt can hide.
Step 3: Measure and Cut the Vinyl
Carefully measure the sections of your car you plan to wrap. Cut the vinyl into manageable pieces, leaving extra material to account for trimming and adjustments. Working with smaller sections makes the application process easier and minimizes errors.
Step 4: Apply the Vinyl
Start with a flat section of the car, such as the hood or roof. Peel the backing off the vinyl and position it on the surface. Use a squeegee to press the vinyl down, starting from the center and working outward to remove air bubbles. A heat gun can help soften the vinyl, making it easier to stretch and conform to curves.
Step 5: Tackle Edges and Corners
Edges and corners can be tricky, but patience is key. Use the heat gun to gently warm the vinyl, making it pliable enough to wrap around edges seamlessly. Trim any excess material with a sharp utility knife for a clean finish.
Step 6: Smooth Out Imperfections
Inspect the wrapped surface for bubbles or wrinkles. Use the squeegee and heat gun to smooth out any imperfections. This step ensures your wrap has a professional appearance.
Step 7: Repeat for Each Section
Continue wrapping each section of your car, following the same process. Take your time to ensure consistency in application and alignment.(Satin Vinyl Wraps)
Step 8: Final Touches
Once every section is wrapped, go over the entire car with the heat gun to seal the vinyl in place. This step helps improve adhesion and prevents peeling over time.
Step 9: Maintain Your Matte Wrap
To keep your new look pristine, clean your wrapped car regularly with a gentle soap and water solution. Avoid abrasive cleaners or automatic car washes that could damage the vinyl.
Transforming your car’s exterior with matte vinyl wraps is a rewarding project that can elevate its aesthetic appeal while protecting its paint. Whether you do it yourself or hire a professional, the result is sure to turn heads on the road!